What is a ClickUp Custom Field?
A ClickUp Custom Field is a feature that allows you to customize your ClickUp Workspace by adding different types of data to Lists, Folders, Spaces, or your entire Workspace.
You can use the same Custom Field in multiple locations, and there are many different Custom Field types available, each containing different types of data.
For example, you can create a Phone Custom Field to capture client phone numbers or use Formula Fields to perform calculations.
Custom Fields are very useful and can be used to track, sort, and filter work according to your team’s needs.
To enable the Custom Fields ClickUp App, you need to:
- click your Workspace avatar,
- select ClickApps, browse or search for the Custom Fields ClickApp,
- toggle it on,
- uncheck any Spaces that don’t need Custom Fields
- Choose if you want to sort Custom Fields manually instead of alphabetically
What details are available for a ClickUp Custom Field?
If you are using custom fields and need to send data via the ClickUp API to a custom field from a Gravity form submission, you first need to know the Custom Field ID.
You can use the following snippet to output the ID, Field Name, Field Type, and any options defined for that field:
 function ns_cb_clicupapi_customfields(){

        $listid = YOURLISTID;
        $apikey = CKUP_API_KEY;

        $listendpoint_url ='https://api.clickup.com/api/v2/list/'.$listid;
        $endpoint_url ='https://api.clickup.com/api/v2/list/'.$listid.'/field';

        ns_debug_to_console($endpoint_url);


        //List Details
        $listresponse = wp_remote_post( $listendpoint_url, array(
            'method' => 'GET',
            'headers' => array( 'Authorization' => $apikey, 'Content-Type'  => 'application/json' ),
        // 'body' => $body
        ) );

        $listresult = json_decode($listresponse['body']);


        echo '<h2>List #'.$listid.' - '.$listresult->name.'</h2>';
        echo '<p>Folder: '.$listresult->folder->name.'</p>';


        $response = wp_remote_post( $endpoint_url, array(
            'method' => 'GET',
            'headers' => array( 'Authorization' => $apikey, 'Content-Type'  => 'application/json' ),
        // 'body' => $body
        ) );

        $result =json_decode($response['body']);
        $i=1;
        echo '
                <h3>Click Up Team Custom Fields for List#'.$listid.'</h3>
                <table class="ns-admin">
                <tr>
                        <td></td>
                    <td>ID</td>
                    <td>Field Name</td>
                    <td>Type</td>
                </tr>';


                foreach ($result->fields as $field){
                        echo '
                            <tr>
                                <td>'. $i.'</td>
                                <td>'.$field->id.'</td>
                                <td>'.$field->name.'</td>
                                <td>'.$field->type.'</td>
                                <td>';
                                $typeconfigs = array();

                                $typeconfigs= $field->type_config;

                                if(!empty( $typeconfigs)){
                                    echo '<table>';
                                    if (!empty($typeconfigs)){
                                        foreach ($typeconfigs as $typeconfig){
                                            //$options = $typeconfig;
                                            if (!empty($typeconfig)){

                                                foreach ($typeconfig  as $option) {
                                                    echo '
                                                        <tr>
                                                            <td>'.$option->id.'</td>
                                                            <td>'.$option->name.'</td>
                                                            <td>'.$option->color.'</td>
                                                            <td>'.$option->orderindex.'</td>
                                                        </tr>';
                                                }
                                            }
                                        }
                                    }
                                    echo '</table>';
                            }
                                echo '</td>
                            </tr>';
                            $i++;
                }

        echo '</table>';
        echo 'Total: '.$i;

                }
 }

// Call the function to get the field info
ns_cb_clicupapi_customfields();
This should output an (very basically styled) table such as:
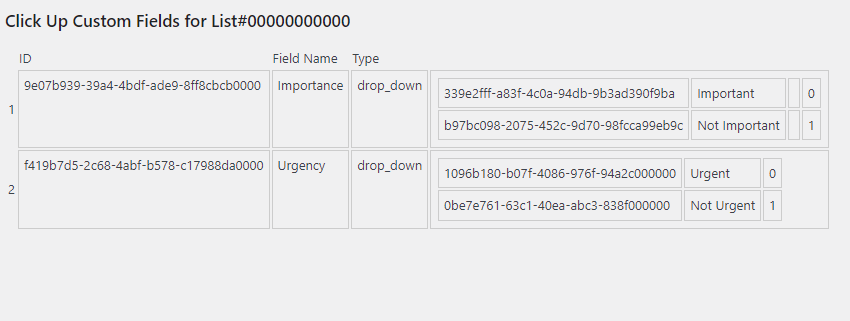
I find this snippet helpful when I need to map a WordPress Gravity forms submission to create a new task. It allows me to view the fields of any given list easily.
Need help connecting ClickUp and Gravity Forms?
Fill in the form to get started today!